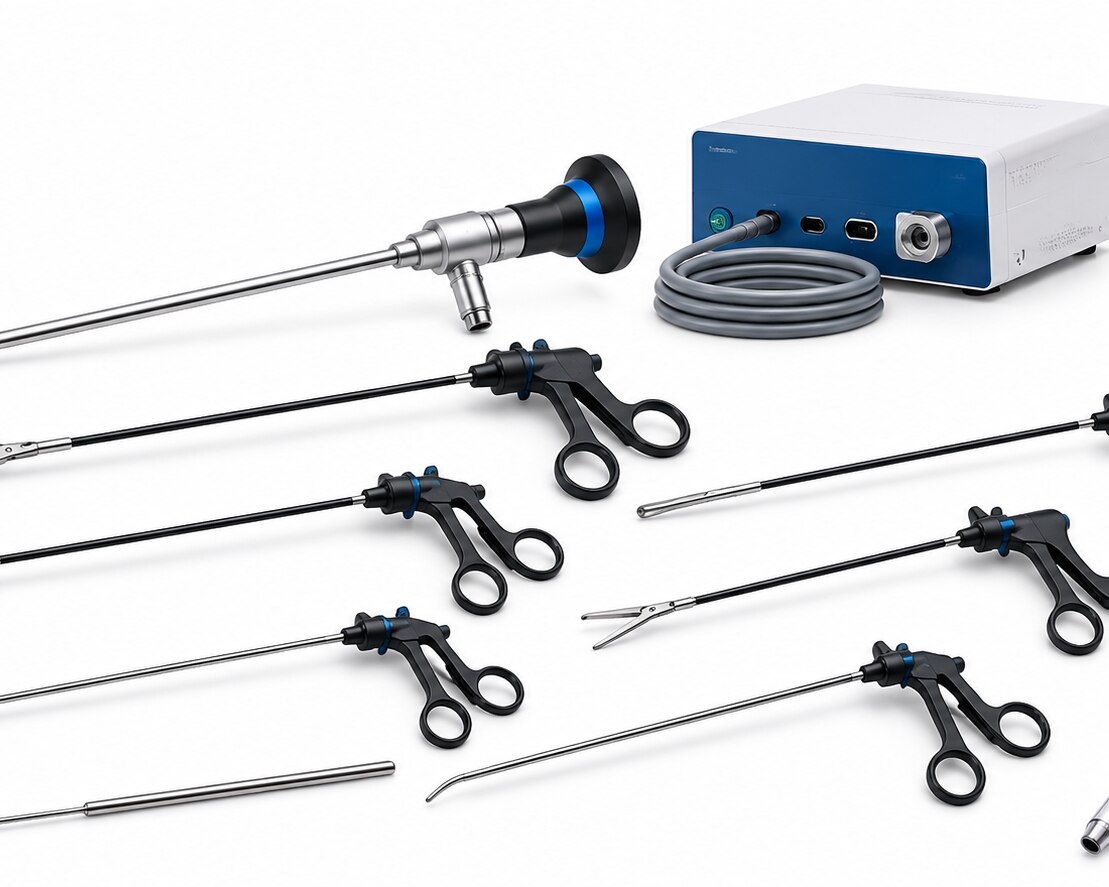
A laparoscopic setup is more than a camera, trocar and a handful of graspers: each instrument supports a defined step, from abdominal access and exposure to dissection, haemostasis, suturing and specimen extraction. By the end, you will be able to identify the core instruments, compare their technical features, plan procedure-specific trays, and assess safety, reprocessing effort and total ownership cost.
Key takeaways
- Choose Veress or Hasson access according to the entry technique and patient factors.
- Match graspers, dissectors and needle holders to the anatomy and suturing task.
- Confirm energy-device compatibility, haemostasis needs and suction-irrigation functions before purchase.
- Request cleaning instructions, sterilisation limits, repair support and traceability documents for reusable instruments.
The Core Laparoscopic Inventory: Access, Optics and Extraction
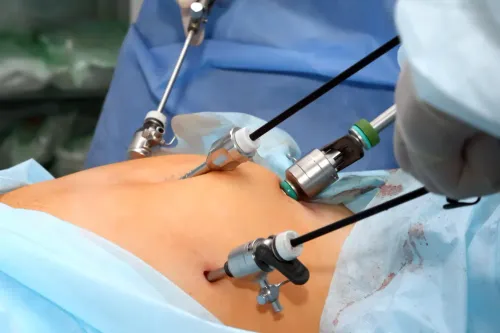
Access begins with either a Veress needle or Hasson access. With closed access, the Veress needle enters the abdomen and CO2 insufflation creates working space before a trocar is placed; Hasson access uses an incision, blunt cannula and fascial seal. Optical or blunt-tip trocars are alternatives, not interchangeable versions.
Common cannulas measure 5 mm or 10–12 mm.
- Trocars and cannulas establish working ports; the larger size accommodates staplers, clip appliers and extraction devices.
- Rigid laparoscopes provide vision through a telescope, light cable, camera head, coupler and monitor connection.
- Specimen-retrieval bags contain tissue or fluid during removal and reduce contact with the abdominal wall. Match bag capacity, opening size and puncture resistance to the specimen and extraction port.
| Scope or access choice | What it provides | When it applies |
|---|---|---|
| 0-degree laparoscope | Straight-ahead view through the telescope | Direct viewing along the instrument axis |
| 30-degree laparoscope | Angled view that changes when the telescope rotates | Looking around organs and changing the operative perspective |
| Veress needle | Closed entry before pneumoperitoneum | Established institutional technique and suitable anatomy |
| Hasson access | Open entry with a blunt cannula and fascial seal | Prior surgery, altered anatomy or a surgeon’s selected open technique |
Instruments for Exposure, Dissection and Intracorporeal Suturing
Graspers create exposure by holding tissue, while dissectors separate planes, scissors divide tissue, and needle holders complete intracorporeal suturing. Choose jaw geometry for the tissue: atraumatic bowel graspers and fenestrated graspers distribute pressure across bowel and omentum, reducing crush and serosal injury.
1. Use graspers to retract, elevate and counter-traction tissue. A toothed grasper suits fascia or firm tissue, but its teeth can tear bowel; “grasper” alone is not a sufficient specification.
2. Select a Maryland dissector for fine blunt spreading and, in compatible designs, bipolar work. A right-angle dissector reaches around ducts and vessels, while a hook dissector provides a concentrated tip for monopolar cutting or coagulation; activate it only with the tip visible.
3. Laparoscopic scissors cut peritoneum, adhesions and selected tissue under direct vision. Keep the blades aligned with the intended cut, because pushing closed jaws through tissue causes tearing rather than controlled division.
4. Needle holders drive the needle through tissue and retrieve it for intracorporeal suturing. Check jaw alignment, textured or carbide inserts, shaft rotation and needle control; jaw play lets the needle twist, damages tissue and prolongs knot tying.
Use a dedicated needle holder, not a grasper. Its jaws must secure the needle’s body without crushing it, while rotation lets you reproduce the needle’s curve inside the abdomen.
Energy Devices, Haemostasis and Suction-Irrigation
Choose the energy device according to the bleeding target, tissue thickness and generator, not by substituting an ordinary grasper. Monopolar instruments need a patient return electrode and a complete current path; damaged insulation or unintended coupling can cause thermal injury outside the visible target.
| Device | Tissue effect and use | Compatibility and principal risk |
|---|---|---|
| Monopolar instruments | Concentrated cutting or coagulation; hook tips suit precise dissection | Requires patient return electrode, insulation checks and matching generator; stray current, fire and burn risks |
| Bipolar instruments | Current stays between jaw electrodes, but desiccation and retained heat still spread injury | Confirm generator compatibility and inspect jaw alignment |
| Advanced bipolar vessel sealing | Compresses and seals vessels within its specified diameter and tissue-thickness range | Verify generator, handpiece, jaw size, activation feedback and seal diameter |
| Ultrasonic dissectors | Vibrating jaws cut and coagulate with different thermal spread from electrosurgery | Use the specified handpiece and generator; do not assume ordinary graspers are compatible |
Maryland bipolar dissectors provide fine blunt dissection; monopolar hooks create a concentrated thermal point and require a visible active tip. Suction-irrigation instruments clear blood, smoke and debris while delivering fluid, but excessive suction can collapse the field.
Check pump-compatible tubing, valves and channels, then flush them completely: lumen blockage compromises visibility and creates a reprocessing failure.
Matching Instrument Design to Anatomy and Procedure
Choose trocar dimensions by anatomy and specimen size, not habit. Use 5 mm cannulas for graspers and dissectors; use 10–12 mm cannulas for staplers, clip appliers, or extraction. Specify trocar valve design, seal type, fixation method, and a blunt or optical entry tip.
Deep abdominal walls may need increased shaft length, low-friction seals, and secure fixation.
| Instrument choice | Design decision | Best fit |
|---|---|---|
| Cholecystectomy set | 30° optics, Maryland dissector, hook with insulated shaft, 5 mm cannulas | Calot’s triangle dissection and controlled cautery |
| Gynaecology set | Long shafts, atraumatic graspers, rotating needle holder, 5–10 mm access | Deep pelvis and intracorporeal suturing |
| Appendectomy set | Slim atraumatic grasper, bipolar or ultrasonic tool, 5 mm access | Appendix mobilisation and mesoappendix control |
| Colorectal set | Longer shaft length, bowel grasper, 10–12 mm extraction access | Deep pelvis and bulky specimen removal |
| Bariatric set | Extra-long cannulas, reduced-friction seal, reinforced fixation | Thick abdominal wall and distant targets |
Match the jaw profile to tissue: atraumatic jaws for bowel, Maryland jaws for fine dissection, and a hook only with direct vision. A rotation mechanism and ergonomic handle improve control; verify energy-generator compatibility, jaw size, seal diameter, and activation feedback.
Stock duplicates of the primary grasper, dissector, needle holder, and energy tool. Duplicate critical instruments before an emergency conversion, because contamination, failure, or a dropped device can stop the operation.
Inspection, Cleaning and Sterilisation of Reusable Instruments
Before an instrument returns to service, inspect its function, clean every reachable channel, and confirm a validated sterilisation cycle. A hidden residue in a narrow lumen or a damaged seal can carry contamination into the next case.
1. Inspect graspers, scissors and needle holders for jaw alignment, smooth articulation, excessive play, shaft damage and secure removable parts. Check insulated instruments for insulation cracks, connector damage and exposed metal. Test suction-irrigation instruments for leaks, blocked channels, valve function and tubing compatibility.
2. Check telescopes for optical clarity, telescope damage, scratched lenses and a secure camera or light connector. A cloudy image or damaged seal is a rejection, not a cleaning issue.
3. Follow the manufacturer’s reusable-cycle guidance for disassembly, including removal of jaws, valves and other removable parts. Start immediate cleaning after use; dried blood is harder to remove and can shield microorganisms. Use brushing and flushing sized for each channel, with special attention to narrow lumens, hinges and rotating joints.
After cleaning, inspect the device again, lubricate only where the instructions specify, then complete packaging and sterilisation validation for the exact instrument and cycle. Record failures, repairs and release checks. Keep clean and dirty routes separate, use labelled transport containers, and apply cross-contamination controls throughout collection, reprocessing and storage.
Comparing Ownership Cost, Documentation and Operating-Room Compatibility
Request a pre-purchase evidence pack, not a catalogue. It should state material grade, working length, jaw opening, diameter, sterilisation method, disassembly steps, brushing, flushing, lubrication and functional tests. Ask for manual cleaning time and compatibility with the hospital’s washer-disinfector and ultrasonic cleaner; hidden lumens increase inspection labour and reprocessing failures.
1. Confirm the warranty, repair turnaround and spare parts policy. Price replacement insulation and jaws, seals, valves, batteries and other consumables; a low purchase price loses value when repairs stop a case list.
2. For vessel-sealing or ultrasonic devices, obtain generator and handpiece compatibility, approved jaw size, maximum seal diameter, tissue-thickness range and activation feedback. Do not substitute an ordinary grasper or generic energy pencil.
3. Check camera and light-cable connectors against existing towers, monitors and light sources. Verify suction-irrigation tubing, valves and channels against the pump, cleaning process and autoclave cycle.
Workflow evidence matters as much as instrument evidence. Confirm that the camera head clears the surgical light, cables reach without crossing sterile traffic, and the operating table permits trocar positioning and scope movement. Windlio International can be assessed by asking for this interface matrix alongside its complete setup quotation.
Ensure staff can identify each instrument, clean it within the stated time and return it to service without delaying the next case.
Frequently asked questions
What is the difference between Veress and Hasson laparoscopic access?
Veress access uses a needle for closed entry followed by CO2 insufflation and trocar placement. Hasson access uses an incision, blunt cannula and fascial seal for open entry.
Which instruments are used for laparoscopic exposure and dissection?
Common options include atraumatic graspers, toothed graspers, Maryland dissectors, blunt dissectors and laparoscopic retractors. Select the jaw shape and shaft length for the tissue and access angle.
What should you compare when selecting laparoscopic energy devices?
Compare monopolar and bipolar functions, ultrasonic or advanced vessel-sealing capability, generator compatibility, activation controls, insulation quality and the intended vessel-sealing range.
How are reusable laparoscopic instruments cleaned and sterilised?
Follow the manufacturer’s validated instructions: disassemble removable parts, flush lumens, brush channels, inspect insulation and jaws, lubricate approved joints, package correctly and use the specified sterilisation cycle.